Maker Faire UK 2014

makerfaire uk

Well it was Thursday the 24th of March and while scanning our twitter feed I noticed that the UK Maker Faire was on in 2 days’ time, without further ado I bought a family ticket for the weekend, booked the last hotel room I could find in Newcastle (in what turned out to be the Stag and Hen night HQ of Britain – a good night’s sleep it was not) and booked the train tickets. My alarm went off at an ungodly hour and we were on the train for 07:11 (yawn). We rolled in to Newcastle Central at a respectable 09:33 and headed to the hotel to drop our bags off.

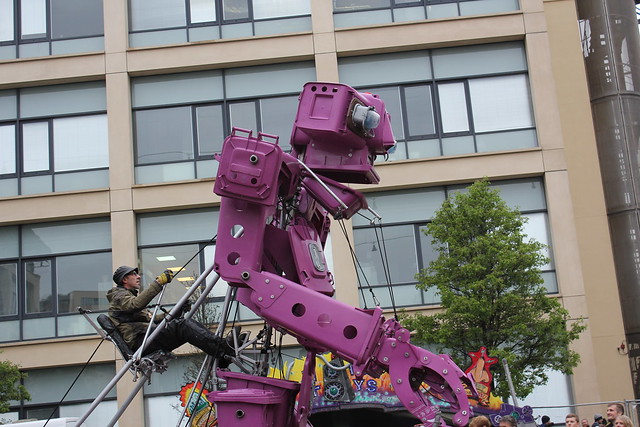
As we arrived at the Life Science centre we were met by a huge purple puppet / Robot called BinBot, which as the name suggests was made from bins, and she was busy singing and dancing around the square.
IMG_9525

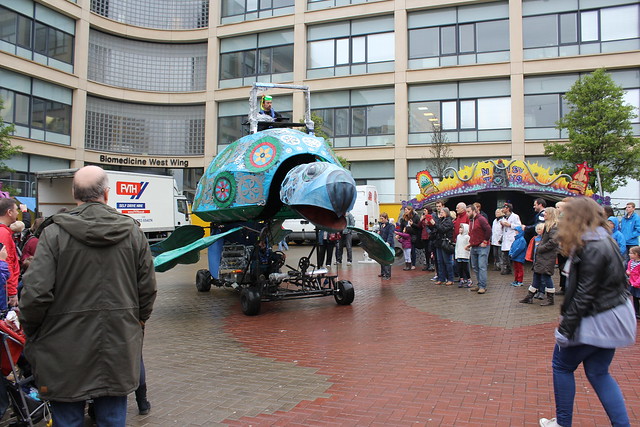
Turbo the Disco Turtle was cruising behind with a DJ wearing a snorkel playing ‘under the sea’.
IMG_9521

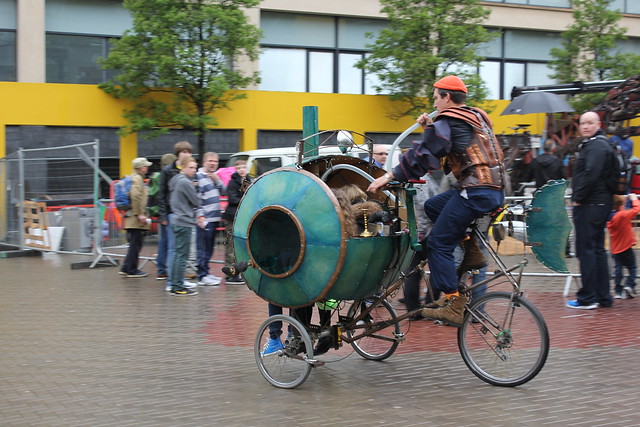
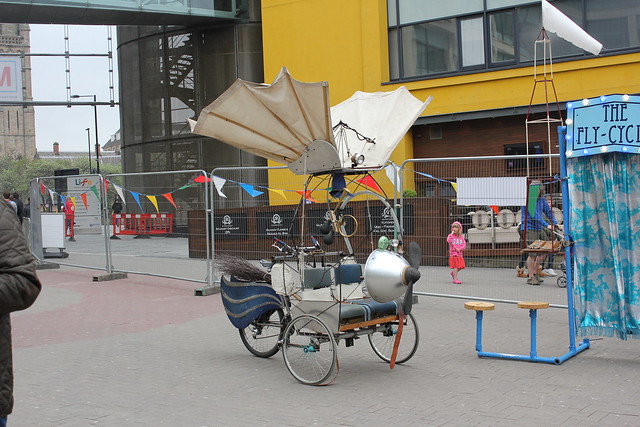
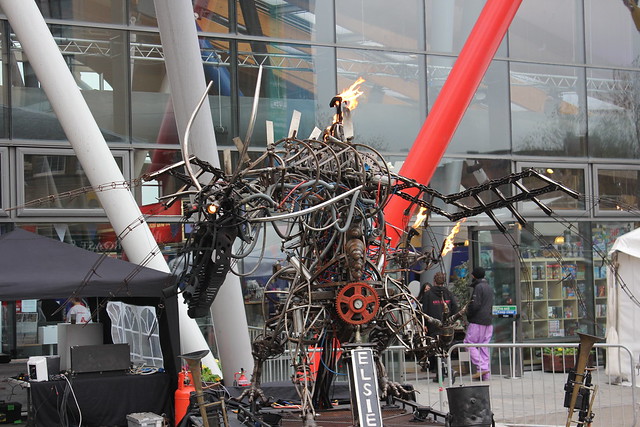
As we walked do to the front door we avoided being run over by some children being peddled around in the Flycycle and the Submercycle, a clown in a clown car and a man cycling what looked like a seat slung between two penny farthing wheels. We then passed a Dragon and a mechanical RC horse – so nothing unusual there.
IMG_9508
IMG_9333
IMG_9335

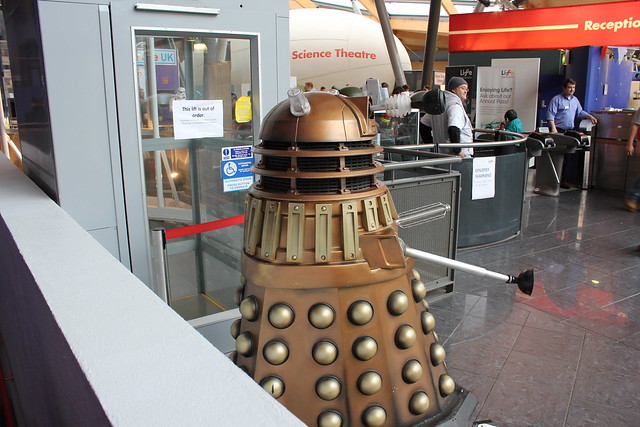
After getting through the doors we were met by a Dalek (well a few of them) made by the Northern Charity Daleks.

IMG_9531

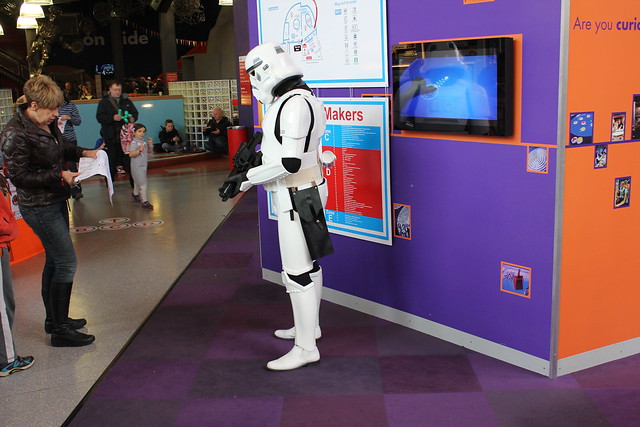
In a stall not so far, far away (sorry) were the Rebel Legion UK.
IMG_9495

And then we were in the first of the halls, can you spot yourself?
IMG_9337

And here are some of my highlights:

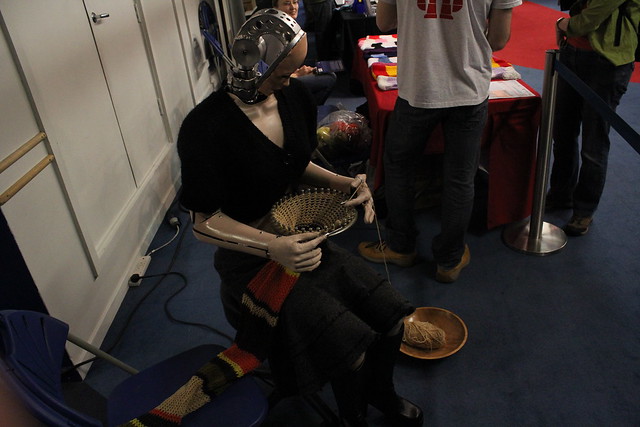
Agnes RoboKnit the scarf knitting Robot.


This was truly awesome, a mannequin robot that sits and knits scarves, she also has a habit of looking up at you and creeping the bejesus out of you. She was created by Andy Noyes and if you like you can check out her Facebook page.
IMG_9351
IMG_9378

DoES Liverpool

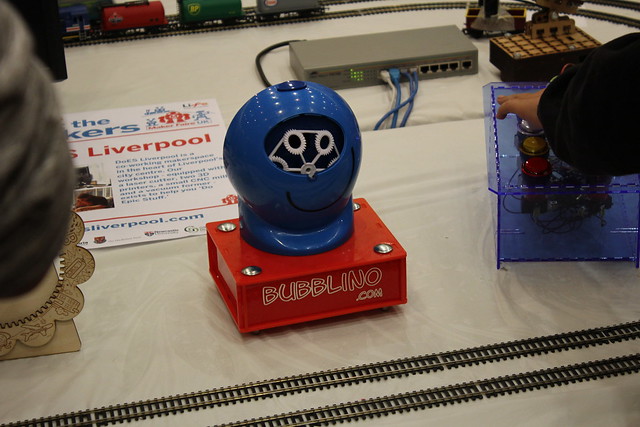
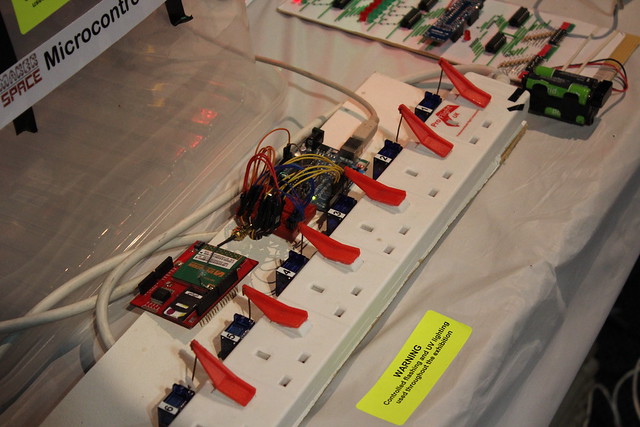
At this stand they had a very cool model railway which was controlled not only by a nice homemade controller but also via a web based app, simply by going to the URL you could start, stop, speed up, slow down and reverse the direction of the trains from anywhere with an internet connection. They also had the Bubblino which when someone tweeted #bubblino or #makerfaire_uk it would make pretty bubble!

IMG_9484

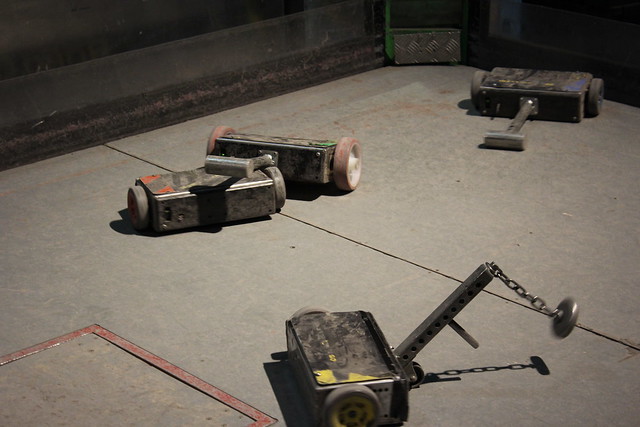
Robot Arena – RoboChallenge.co.uk

This was loud and fun, my kids loved smashing each other’s robots in the Arena – took me back to watching Robot Wars back in the day.

IMG_9477

IMG_9494

They also has a disturbing looking Robot they made for the Gadget Show – it looked like they had cut Jason Bradbury’s head off and stuck it on a Robot waiters body.

IMG_9421


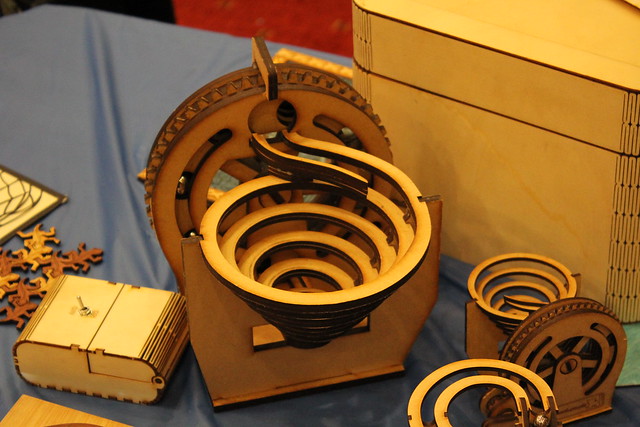
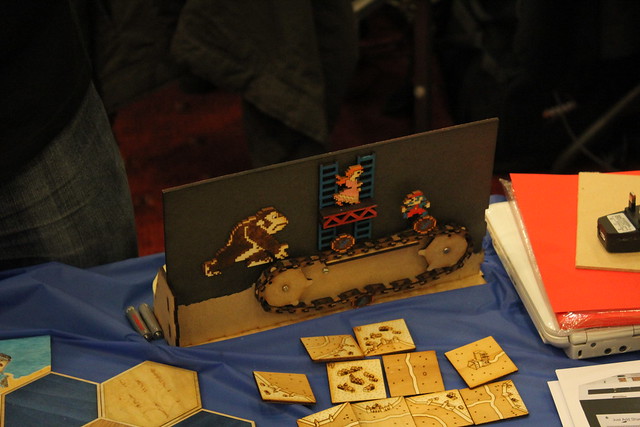
Just add Sharks – Laser cutters

At this stand they make laser cutters and had some excellent examples of what you can create with them, have a wee look – the useless box was great, switch it on then it opens and a little finger switches it back off again.

IMG_9361
IMG_9362

BlinkStick

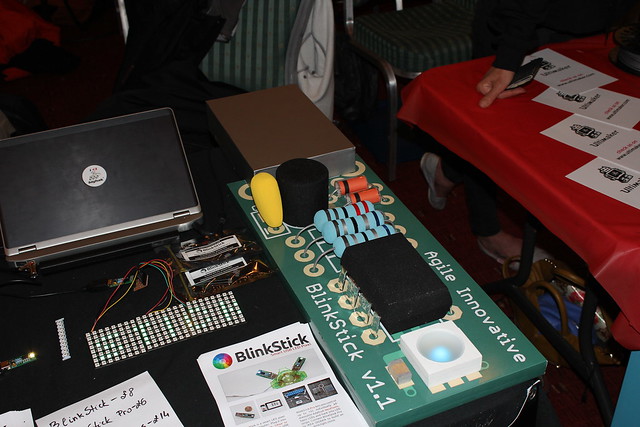
BlinkStick is a USB-controlled smart pixel. It is an easy and fun way to build a notification light for your computer featuring a growing list of API implementations for programming languages and operating systems making it very easy to control.

It’s fully open source and designed to be both educational and practical.

IMG_9365

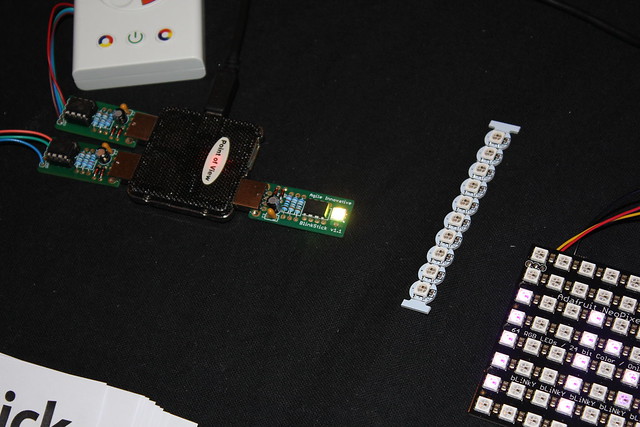
And they also made a huge macro version of the board which was very, very cool.
IMG_9364

Shrimping.it

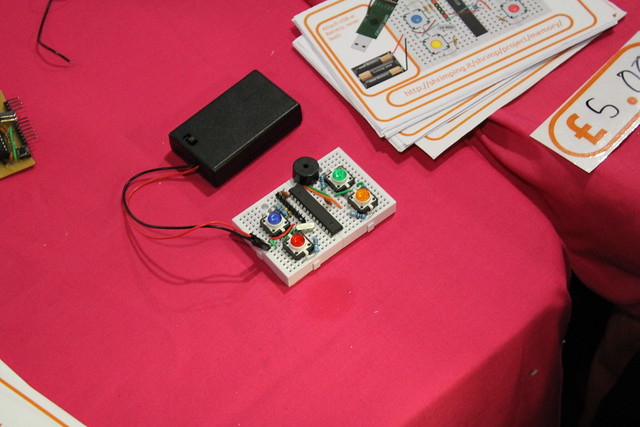
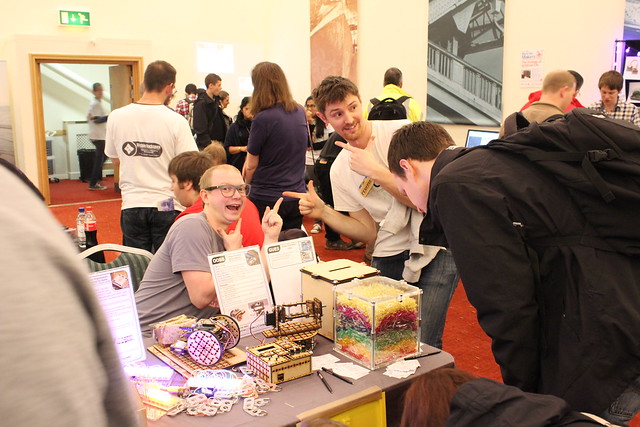
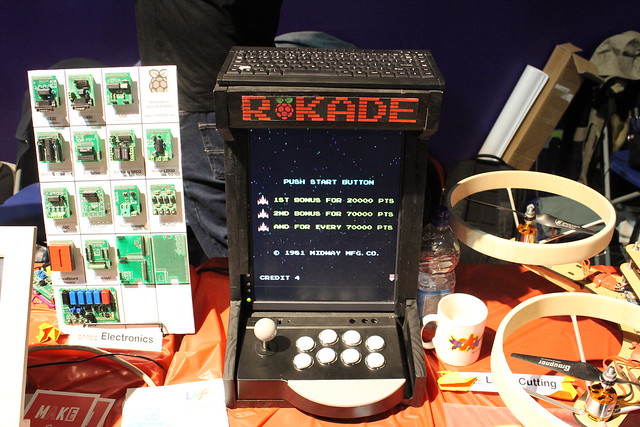
They make low cost projects as an alternative to buying an Arduino, they are all made on a breadboard and are very easy put together, although they will sell the kits they also encourage you to source your own parts or use parts you have lying around. Check them out

IMG_9385

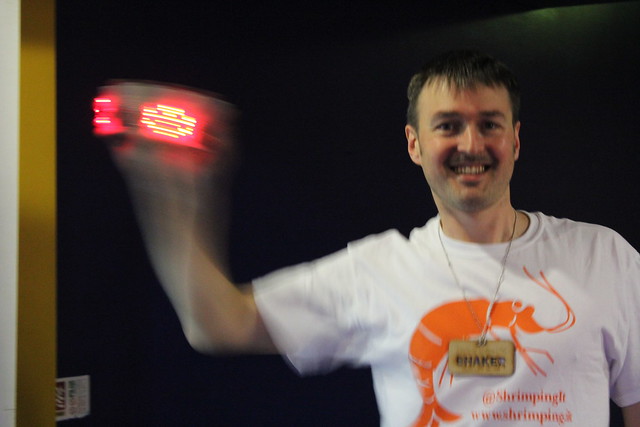
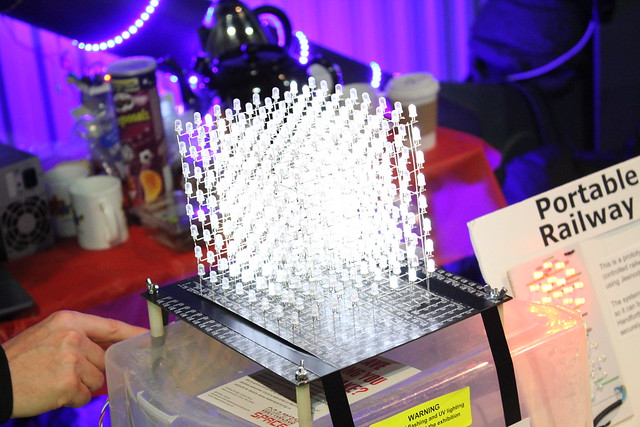
You can see their PoV project in this rather unprofessionally taken picture (I’m not sure how to increase the exposure time).

IMG_9396


UK Hackerspace foundation

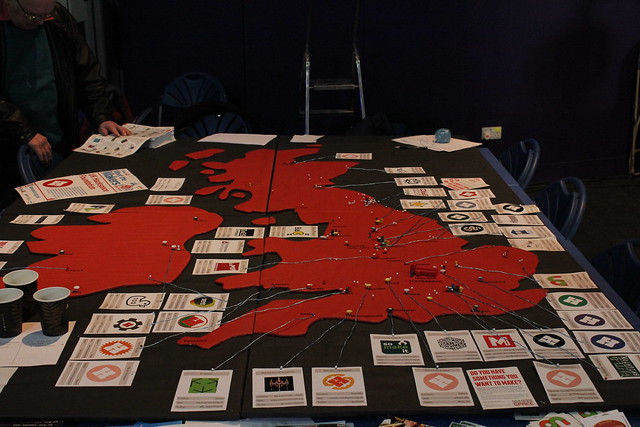
A huge map showing all the hackerspaces in the UK still room for more I think.
IMG_9356

I also met the dude from Oomlout and I got 4 key rings, yay!

IMG_9490

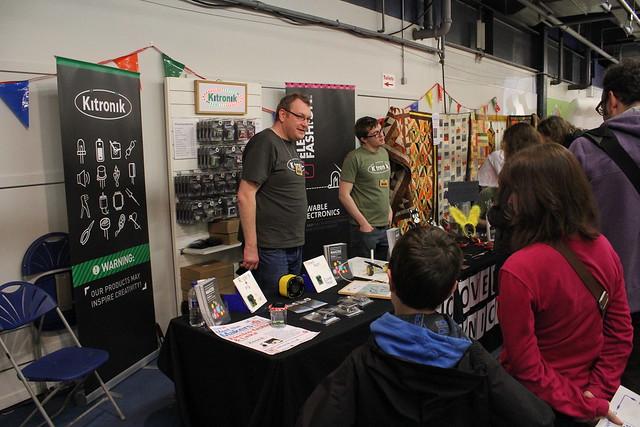
I also said hello to the Kitronik guys where i saw there new e-textile cat kit which you can now pick up in our store

IMG_9369


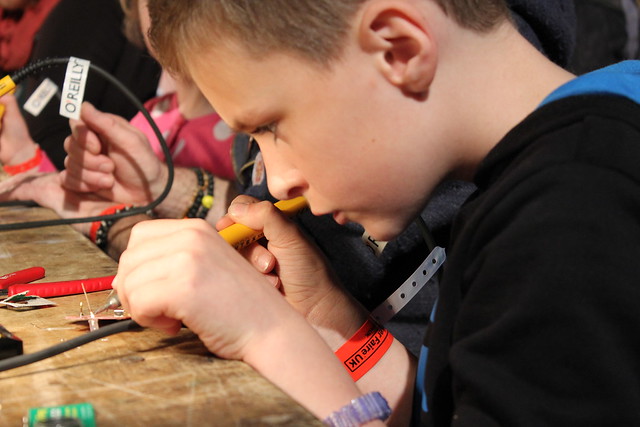
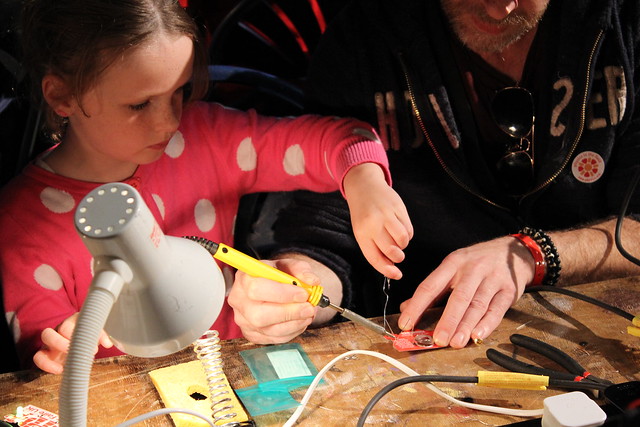
Soldering with Mitch Altman

My kids loved the soldering workshop with Mitch Altman and they got to keep their own flashing maker badges, I’ve not seen them so quiet for ages, which was nice.
IMG_9454
IMG_9463

Newcastle maker space

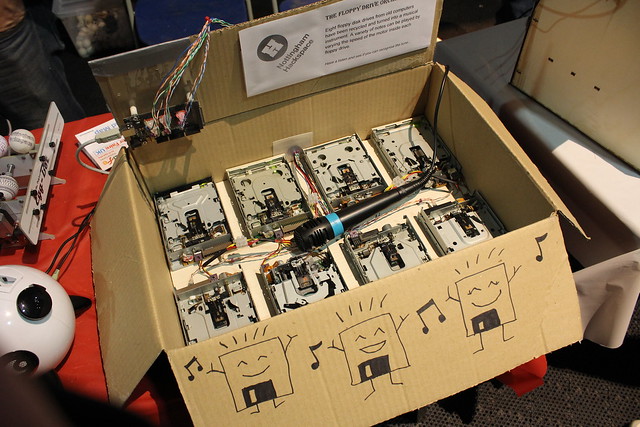
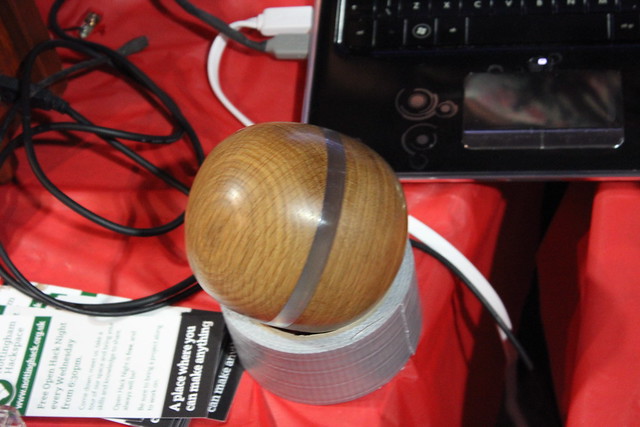
These guys had so many cool things it’s easier just to show some pictures:
IMG_9452
IMG_9450
IMG_9449
IMG_9446


Nottingham Hackerspace

Musical floppy drives, nuff said 🙂
IMG_9443

and a very heavy tactile ‘thing’
IMG_9441

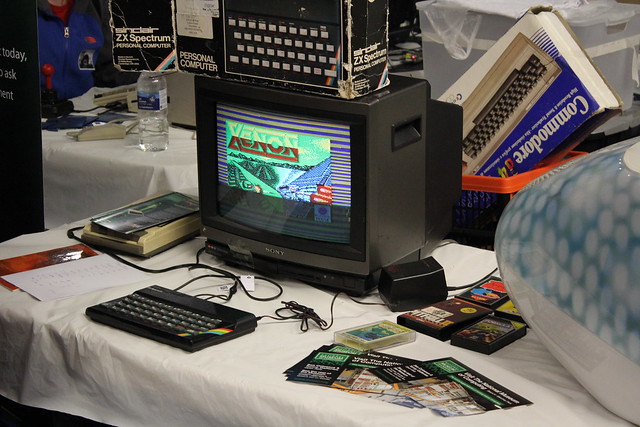
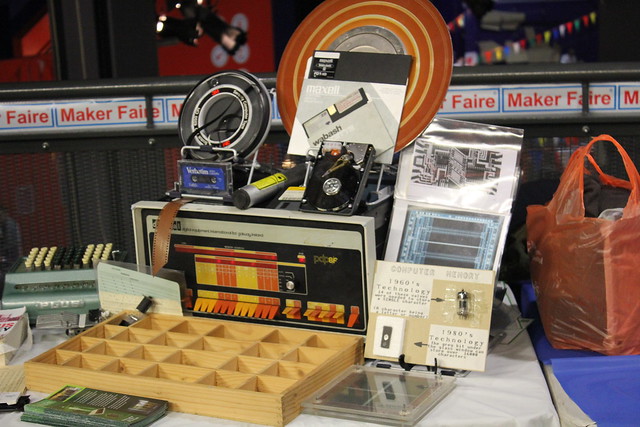
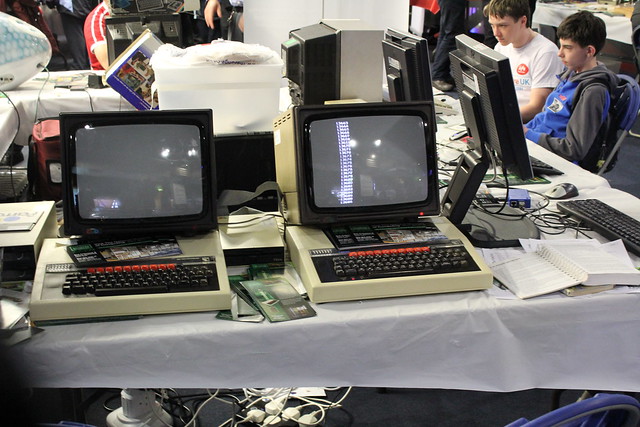
 The National Museum of Computing

This stall was awesome, and now I must visit the actual museum, my wife has said so 🙂 here’s a few pictures:
IMG_9384
IMG_9391
IMG_9414
IMG_9388


10 PRINT "Thanks for reading"
20 GOTO 10
run

Posted in Uncategorized | 1 Comment

Project Horizon – Beat Felix!

Welcome to the first article about Horizon’s new mission, ‘Beat Felix!’ Horizon is the near space programme at Queen Mary’s Grammar School, Walsall. We are a team of pupils who build and launch autonomous probes into the region of the atmosphere known as ‘near space’ (20-100km above the Earth’s surface).

1Photo of the Isle of Wight taken at 32000m by the Go Pro Hero 2 onboard Horizon 2

Last year’s team launched the first two Horizon probes, carried the UK’s Space Mascot ‘CASSiE’ on her first high altitude flight (more about her later!), set the 44th Highest World Amateur Altitude and brought back footage of the journey through the blue, familiar Troposphere and out into the cold black void of the Stratosphere.
Inspired by last year’s ‘Near Space Jump’ we plan to beat the altitude achieved by Felix Baumgartner and the Red Bull Stratos Team and go after a top ten position in the Amateur World Altitude Records. Roy Fisher and the team at Proto-pic.co.uk have generously offered their support for our programme’s goals and we’re really looking forward to working with them to bring you the inside story on the project and its progress.

HOW WILL WE DO IT?
We have three launches planned this year; early May, late June and early July. The first launch will be a training mission as we find our feet. Our first launch will be ‘Horizon 3’ (a working title until we come up with a better name for it), a light weight, energy efficient version of last year’s probe.

2Horizon 1 ready for launch – From left to right: The payload box, pre-deployed parachute and weather balloon

The probe will be carried under a pre-deployed parachute which will be attached to a helium filled weather balloon. It will contain:
–    a flight computer which will transmit the probe’s location back to Earth using a radio signal;
–    a sensor array which will record temperature inside and outside of the probe, relative humidity and atmospheric pressure;
–    a back-up tracker in the form of a small smartphone which can be commanded to  send its exact location back by text message;
–    a GoPro Hero 2 video camera to capture in-flight footage.
By visiting our webpage you’ll be able to track the probe’s location throughout the flight and hopefully watch the launch live on ‘Horizon TV’.
3

The first Flight Computer built by the Horizon Team undergoing testing

Horizon 4 and 5 (again, working titles) are out record attempts and will launch in June and July. These probes will be even lighter than Horizon 3, weighing just a couple of hundred grams. They will be attached to Hydrogen filled weather balloons. Hydrogen provides greater lift than Helium but is more volatile and so we have the gas experts from BOC Gases UK helping us design new filling equipment and write new safety procedures. The probes will carry a light-weight flight computer so that we can track them throughout their flight. They should achieve an even greater altitude than Horizon 3 but we will probably have to travel much further to retrieve them.

WHAT IS ‘NEAR SPACE’?
The Earth’s atmosphere is made up of several distinct layers. The first layer is the Troposphere. This is our blue breathable atmosphere; it contains most of the world’s moisture and varies in thickness from 10km at the poles to 17km at the equator. Commercial aircraft fly in this region at between 9 and 12km in altitude.

4Photograph of a plane over West Berkshire, taken by the automated camera on Horizon 2.
The Troposphere transitions into the Stratosphere which is black, very thin (almost negligible pressure) and has a background of cosmic radiation level approximately a hundred times that at sea level. The Stratosphere runs from the top of the Troposphere to 50km above sea level and contains the Ozone Layer which prevents an intense flux of ultraviolet radiation from reaching the surface of Earth.

WHAT IS PROJECT HORIZON?
Project Horizon was founded in February 2012 by a mathematics teacher at Queen Mary’s Grammar School, Walsall. He originally intended to recruit a small team to build an autonomous probe and fly it into the Stratosphere using a weather balloon filled with Helium. The pupils’ response to the project was overwhelming and it quickly became clear that the project could have much greater scope. Instead of just one launch he decided to set up a near space program capable of carrying out launches every year. Pupils were recruited into four teams:
–    Publicity and Sponsorship
–    General Engineering and Radio
–    Electrical Engineering
–    ICT and Media

5The Horizon Team preparing for the launch of Horizon 1
The four teams worked together to plan, design and build the different aspects of the project. The pupils also setup a live online video feed for launch days dubbed ‘Horizon TV’. A bigger project required wider goals and Horizon now aims to:
–    develop a reusable launch platform that could make regular trips into the Stratosphere (30-40km above the Earth’s Surface and far beyond the safe blue breathable atmosphere).
–    provide a rich STEM (Science, Technology, Engineering and Mathematics) activity at the school which was accessible to the pupils and ran on a shoe-string budget.
–    inspire pupils at the school to take an early interest in Space science, the UK Space Industry , STEM subjects and activities.
–    forge links between the school and engineering/technology firms in order to broaden the pupils’ aspirations and discover exciting new opportunities for them.
A fresh team are recruited and trained each year and each team has their own mission and adds their own touch to the programme. Horizon also enjoys the support of the UK’s Space Mascot ‘CASSiE’ and her creator Vix Southgate.

6CASSIE- The UK Space Mascot (mini version)

To find out more about CASSiE and her adventures please head over to her blog (http://spacemascotuk.wordpress.com) or her facebook page (https://www.facebook.com/SpaceMascotUK)

We hope this initial article has piqued your interest. To learn more about the project’s past, head on over to our website (http://horizon.qmgs.walsall.sch.uk). We’ll be writing more articles for the proto-pic.co.uk blog as the project develops and you can get the very latest news from the project’s twitter feed (https://twitter.com/horizonqmgs).

7The new Horizon Team working on ‘Beat Felix!’

Posted in Uncategorized | Tagged , , , , , | 1 Comment

Open Source, Prototyping and DIY technology

We are definitely finding that going from project concept to a finished product is becoming much more accessible to new starts.

Posted in Uncategorized | 1 Comment

Arduino Tutorial – Episode 1

An introduction to the Arduino, and an overview of how to install the IDE (Programming Environment) & Drivers.

This is the first in our Arduino Tutorial series – Over the next few episodes we will cover electronics basics, and programming the arduino to interact with buttons, LEDs, relays and other fun stuff.

Posted in Uncategorized | Tagged , , | 1 Comment

The Rolls Royce of Arduino Controlled Model Railway Turntable Controller

Roy builds a custom controller for a customer, as usual in Roy’s eyes, a simple controller with switches to locate the alignment, Roy built a programmable controller, with seven push buttons, each with an led, and a stepper motor driver, as well as a potentiometer and a rotary encoder. As the Arduino Pro Micro does not have enough in/out pins to do all of this, Roy used a Resistor Ladder to read the Push buttons, this used 1 input instead of 7.

The Rotary encoder is used when programming the unit, while the potentiometer is used to set the speed of rotation of the potentiometer.

To learn more goto our learn.proto-pic.com site.


Posted in Uncategorized | 2 Comments

Adafruit 1141 Data Logging Shield

Drew tells us about the Adafruit 1141 Data Logging Shield.
Proto-PIC is an authorised Adafruit distributor in the UK.

Check out the Proto-PIC range of Adafruit Products here:

Posted in Uncategorized | Leave a comment

Adafruit 746 Ultimate GPS Breakout Board.

Drew tells us about the Adafruit 746 Ultimate GPS Breakout Board.
Proto-PIC is an authorised Adafruit distributor in the UK.

Check out the Proto-PIC range of Adafruit Products


Posted in Uncategorized | Leave a comment

Building an N-gauge model railway – crying out for Arduino control!

I’m really getting into this blogging stuff. I realised that it doesn’t really have to do with our core business, just as long as its fun and I can justify that at least SOME of our customers will find it useful 🙂

Ever since a young age, I’ve been into model railways. I used to have a huge 18 foot by 9 foot OO gauge layout in the attic at my mum and dads house and I spent many hours getting everything looking nice. When I was about 16 I realised that there was a couple of things that were much better fun than model railways – Beer and Girls – so I sold it all.

Now that I am older, the novelty of beers has worn off and the “girls” have turned into just the one girl – my wife. In addition, we have a wee boy who is obsessed with trains and so I started to rekindle my interest in the hobby again.

I decided that the perfect scale to be workable with would be N gauge. Everything is about half the size of OO, so you can fit quite a complex layout in a very small space, say about 6 foot by 4 foot.

My first attempt was a disaster. I tried to make it too complicated. I had what was effectively 6 lanes of tracks, the inner track having a radius so tight that long locos couldn’t travel round it. I knew I wanted DCC (Digital Command and Control) control so that I could control more than one train on the same piece of track independently. I thought I also wanted to use Peco finescale code 55 track, with electrofrog points, for better realism.

But when it came to wiring up the points it was just a pain. What should have been a fun past-time turned into more of a chore. For example, to use a scissor crossover with DCC, I had to fit two microswitches to the turnout bars and at last count I had 22 wires soldered onto that one piece of track so I could swap polarity as the trains passed over.

I know there were many other ways I could have tackled this problem – an auto reverser module, for example, but by this point I had all the track pinned to the boards and I was having to desolder joins to get access to the back of the track. Bad planning.

I decided to rip it all up and start again. This time I was going to admit to myself that I wasn’t building a super realistic detailed model of a real railway – I was just building something that would give me and my Son lots of fun over the coming years.

I settled upon using the Kato Unitrack system. This has track already sitting on a piece of plastic moulded underlay – something that I would have never thought would look in any way good, but the Kato Track is fantastic looking in my opinion and very reasonably priced.

The other bonus of Kato Unitrack is that the points have the motors for electrical control already built in! This means that the KATO scissors crossover has only 2 wires coming out of it, instead of the 22 I had previously with the PECO setup.

I planned a simple layout that would give me three trains running at the same time using AnyRail 5 software – the trial version. With the trial you only get to lay 50 pieces of track, but by designing your layout in a few different sections, you can still make use of it.

Once I had the plan finalised, AnyRail gives you the complete shopping list of parts to buy. To get round my wife, I bought all the track in three smaller purchases, rather than altogether:). I bought all of my KATO parts from Keith Blanchard at http://www.traintrax.co.uk because I could speak to him on the phone for advice and everything I needed was in stock at great prices.

So, to the build.. I took some step by step pictures. The build is nowhere yet near complete but I went from an empty attic to something my Son and I can play with and add to within about 3 weeks – not too bad.

photo7Pic 1. First thing was to build a base board. I used CLS for the legs and frame and then used 9mm MDF as the base. Building the frame securely is important to ensure that the baseboard won’t sag over time. I then painted the whole surface of the MDF with Solvent based green paint to protect the MDF from any water ingress from Paper mache etc at later stages – since MDF is fibre board it will swell up if wet. I put castors on each leg – doesn’t help with stability but makes it a dream to slide the baseboard around the attic so I can get access where the roof slopes. The baseboard is 1metre x 2.4metres.

photo77Pic 2. Using the Woodland Scenics range of terrain forming equipment, I placed risers where I had planned for track inclines.

photo777Pic 3. 9mm MDF pinned around back and edges of board. Starting to plan for a tunnel in the back quarter. Note that there are cutouts in the MDF so you can get your hand in to pull a derailed train out!

photo5555Pic 4. Using newspaper wads, dry but secured with tape, we bulked up the open spaces at the edge of the incline risers. Also, using polystyrene sheets, we created the retaining walls at the edge of the hill, where the mainline was going.

photo666Pic 5. This is the bit my son likes. Using rolls of wet plaster cloth, cover everything to creat a hard shell of terrain.

photo55Pic 7. Placing the main track loops into location, so we can start working on the tunnel

photo33Pic 8. Paper Wads on main Hill and tunnel

photo555Pic 9. Main hill plastered

photo11Pic 10. Branch line and bridge installed and track functionality “tested” 🙂

photo6Pic 11. Using Woodland Scenics Liquid Pigments and Scatter materials, we started to build the base colours on the hills sections of the branch line, to see how things would look.

photo5Pic 12. Started to add clump foliage to the hill section. White drips are just the PVA glue which dries clear.

photoPic 13. Overview of back section with clump foliage, home-made trees and scatter material. Back board also painted blue to provide a good separator from scenery to sky.

photo1Pic 14. View back along girder bridge, showing scissors crossover.

photo3Pic 15. One piece of track actually complete. This is how it should all look. I reckon the trees that my wife made by hand look awesome!

And that is as far as we have got, so far. The woodland scenic materials are great. As you scatter the grass on and add more and more detail it suddenly goes from looking terrible to looking real!.

This layout is crying out for an Arduino control system. Having all the locos and points DCC controlled means that every item has its own address that can receive commands. Roy, our tech guru has already built a wireless DCC controller for the system. The next stage is to program a few Arduino UNOs, so that myself and my son can sit back and watch the points switch and the trains starting and stopping at the station by magic. If I can get Roy to stop playing with his Raspberry Pi for long enough to get the code written!

Richard

Posted in Uncategorized | 3 Comments

SparkFuns Big Dome Pushbutton Connection Guide

We have had a few people phoning us up here at Proto-PIC asking us how to wire up the Big Dome Pushbutton from SparkFun Electronics switches we sell.

These switches are 100mm in diameter and have a lovely big dome to bash when you want to make the switch.

I have seen them on BBCs “The Voice”.. oops, I mean my WIFE has seen them on BBCs “The Voice” and then shouted me through from another room, where I was doing manly things, to confirm that they were indeed using our big dome switches on that programme I never watch.

When we were asked how to connect them up, we thought “its only a switch, how complicated can it be?” but it actually took three of us and lots of quick schematic sketching to get it to work nicely. The diode tester and the continuity tester on our multimeter both appeared to be giving us results that just didn’t seem physically possible!

So we thought it would be a VERY good idea to get a video done, showing a bit about the pushbutton and how to connect them up, so that the LED inside illuminates when you press the switch and whatever you want to switch on..does.

Apologies for the overuse of the word ehhhhh.. when I am doing the video. With no script and a slight panic that I wasn’t fully understanding a ‘simple’ switch caused my brain to falter 🙂

We also sketched a quick schematic, so you can see how the wiring works :

BigDome Pushbutton

Hope this helps you out.

Richard

We are an Authorised SparkFun Electronics Distributor in the UK. Check out our full range of SparkFun Products.

Posted in Uncategorized | 1 Comment

RAF Leuchars 65th Annual Airshow (and the last one!)

Okay, so i know this is nothing to do with electronics, but here at Proto-PIC we do occasionally get to spend some time with our loved ones.

Last weekend, my time was spent attending the 65th Annual Airshow at RAF Leuchars, just outside St.Andrews – not too far away from the RelChron/Proto-PIC HQ in Kirkcaldy. This year is sadly the last as very soon the RAF will leave Leuchars and the Army will take over the base. Now apparently, they are planning on keeping up the annual show tradition with an display of their own, but in my opinion (apart from the fact you wont get a craned neck from looking up all day) it will not have the same effect as the amazing “Red Arrows” display team throwing their ‘planes about at incredible speeds whilst keeping the wingtips within 5 feet of each other!

It was quite a nice day (if you are scottish – quite cold if you are not!) and we were bussed into the Airbase. The sheer number of people there was astounding. The show started at 10am – we were there at 10am, so at what time did the other 10,000 people in front of us arrive? We headed straight for the end of the Airfield – via an Harrier flight simulator, which was nice – where we knew we would get a good view and noise from the awesome Eurofighter Typhoon doing its thing.

We were instantly treated to a flyby by a squadron of F4 Phantoms, which will always be a personal favourite of mine. I think there is something beautiful about the sleek lines of that craft and i had several miniature versions when i was younger.

When arrived at our chosen position and setup our camp chairs, my father reminded me to put on the ear defenders we had brought along for my son. I thought he was just being over protective of his Grandson – i was wrong – at that moment the Eurofighters started rolling along the runway towards us. I just couldnt believe the noise, that is one loud aeroplane.

A couple of  photos of the Eurofighter in the air

IMG_8418IMG_8426IMG_8440 IMG_8442 IMG_8445

Next was the Red Arrows display team, one man down due to a bad accident last year, but absolutely amazing nonetheless.

IMG_8494 IMG_8495 IMG_8501 IMG_8502

The end of the show spectacle was a fantastic flyover by a WWII Lancaster bomber, A Spitfire and a Hurricane:

IMG_8575 IMG_8576

All in all a fantastic day.  This was my first time at the Leuchars Airshow and sadly it will be my last – i didnt realise what  a great day it was until the final one!

Richard

Posted in Uncategorized | Tagged , | 4 Comments